To use Android x86 emulator you can install it to a VirtualBox without all difficulties of full installation from the CD or USB-drive. You just need to download and open VirtualBox on your PC and Android X86 ISO from articles below. There are some steps, which you need to do for Android OS x86 VirtualBox installation for PC:
- First, install Oracle VM VirtualBox from the official website to your PC
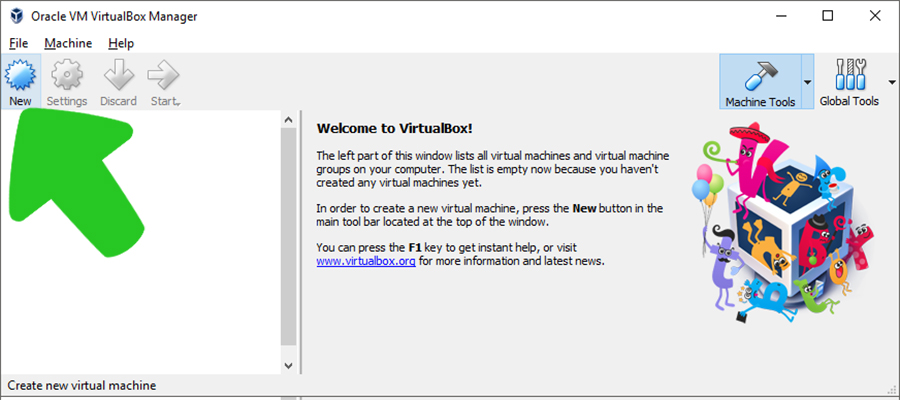
- Start the VirtualBox and press button “New” as on a picture bellow
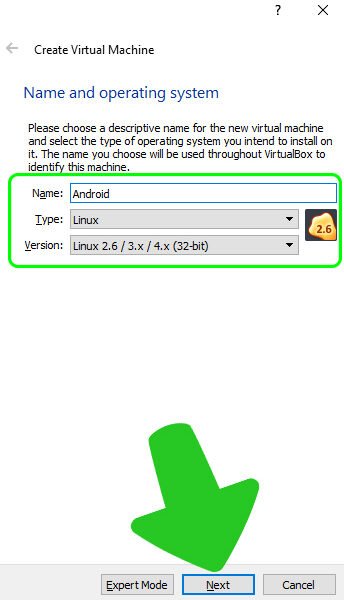
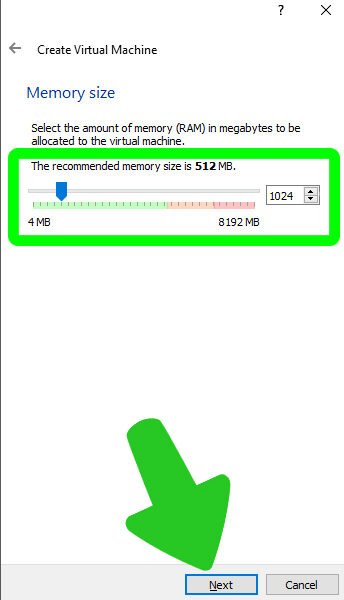
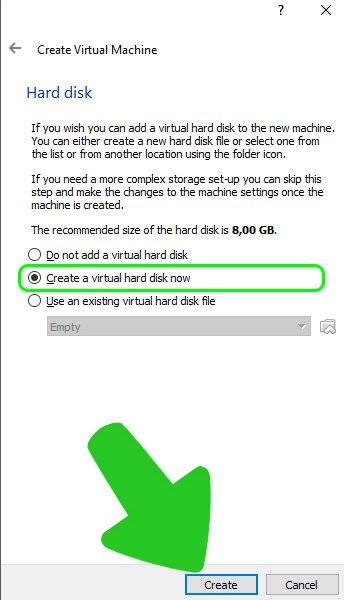
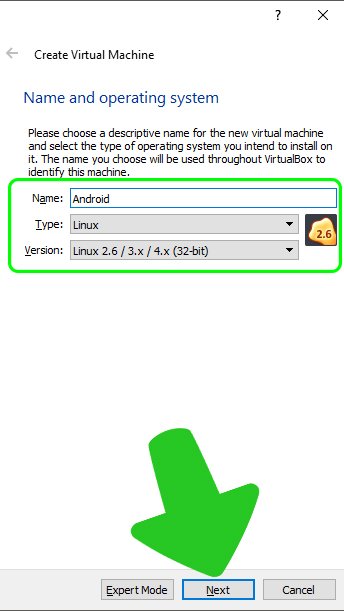
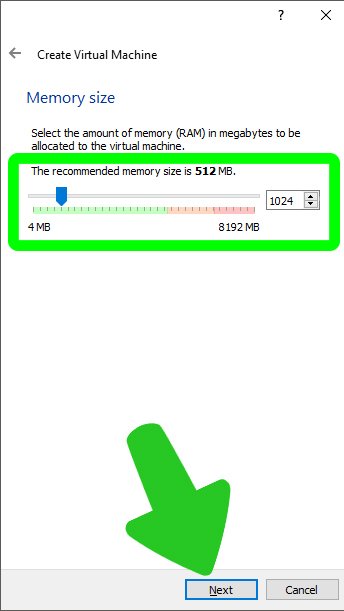
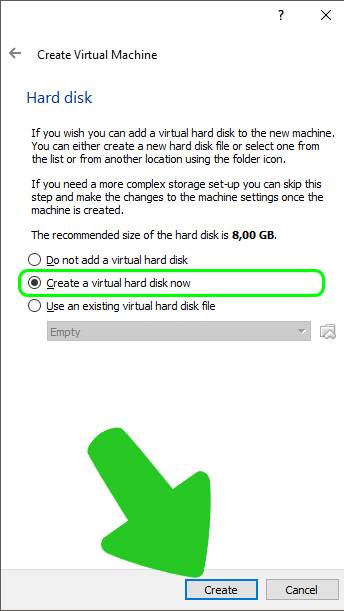
- In new window fill the “Name” of the VM (let it be “Android”), “Type” – Linux and “Version” – Linux 2.6/3.x/4.x (32-bit) and press “Next”. In next window select the amount of RAM: if you have 1 Gb of PC RAM, then choose 512 Mb, otherwise, choose 1 Gb and press “Next”. After that in next window select “Create a virtual hard disk now” and press “Create”
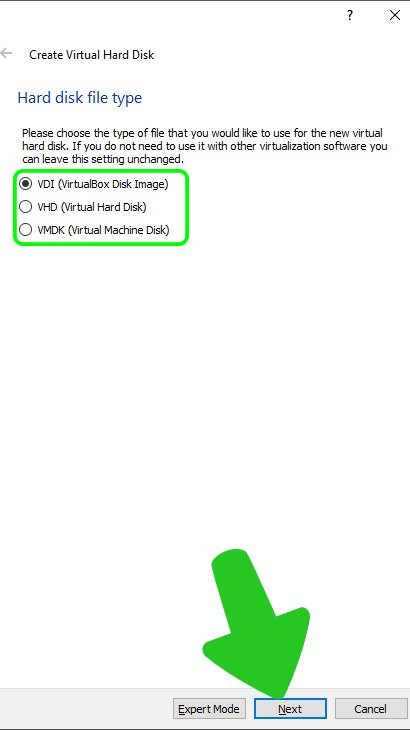
- In the window “Create Virtual Hard Disk” select VDI and press “Next”
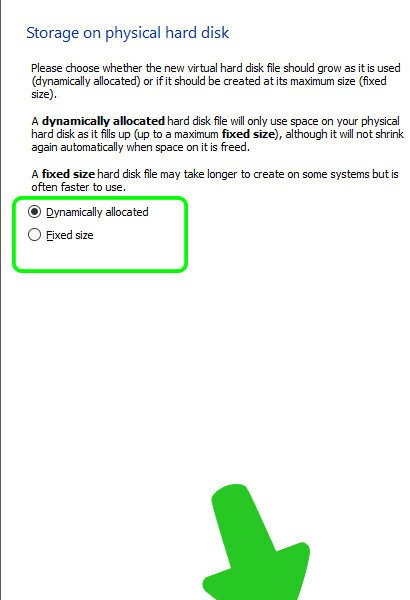
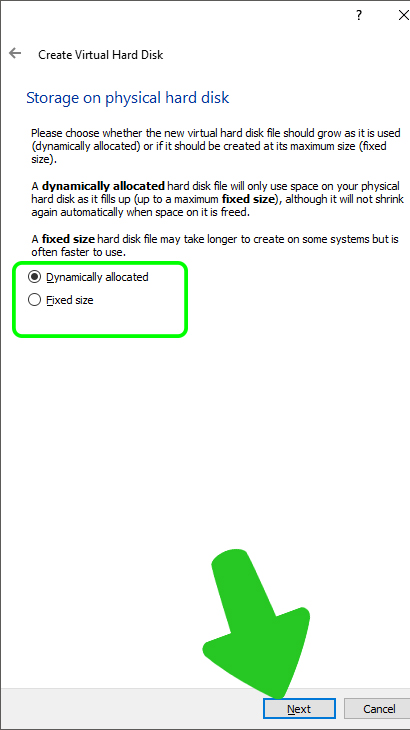
- Here you can select, will your virtual hard disc drive have fixed size, or it will dynamically allocated, choose on your own
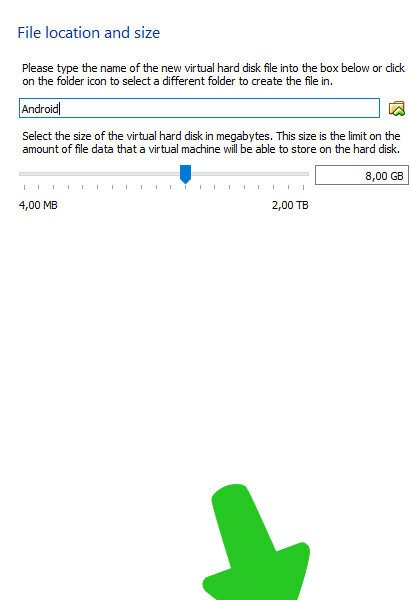
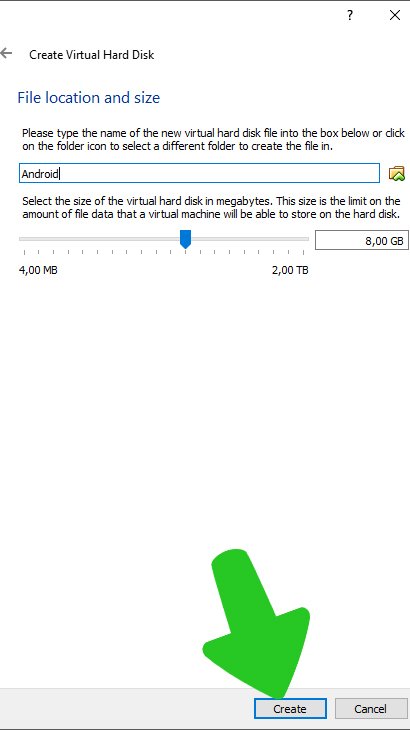
- Choose name for the virtual hard disk and select its size more than 6 GB (I choose standard 8 GB) and press “Create”

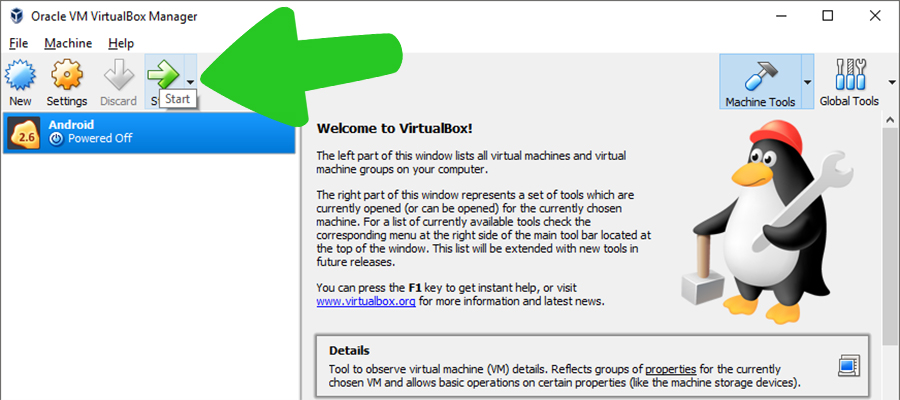
- Now start your VM and in a window “Select start-up disk” select downloaded Android x86 iso and follow the standard instructions of installation as described below
This way to install Android x86 on your Windows PC is easier and you won’t have problems with running of other operative systems.